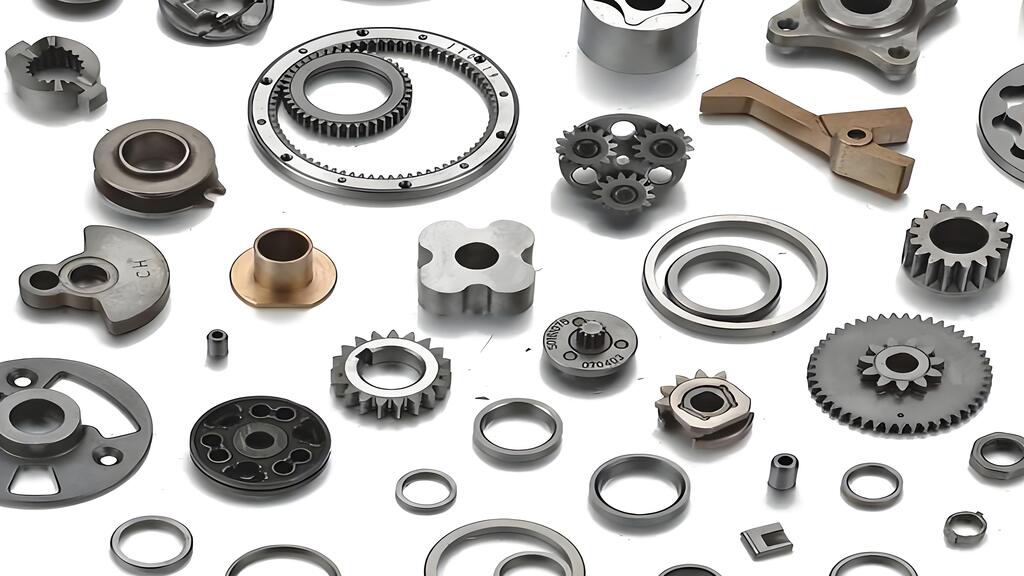


How to Master Powder Compacting: Expert Guide to Die Design Optimization
Powder compacting needs precise pressure control between 150 MPa and 1000 MPa to achieve optimal material properties. This vital manufacturing technique changes loose metal powders into functional parts. The highly efficient process converts up to 97% of raw materials into finished components.
The Powder Metallurgy process has three main steps: mixing and blending powders, powder compaction, and sintering. Double-acting hydraulic presses apply uniform pressure to create powder metal components with specific densities. The density of green compacts (around 4.89 g/cm³) remains lower than theoretical densities (6.75 g/cm³ for NiTi composites). This difference shows why proper die design matters. A well-designed powder compacting die shapes the final attributes of powder metallurgy parts, making optimization vital for manufacturing success.
This piece gets into the basics of powder compacting, explores pressing limitations, and helps you learn about die design optimization to create high-quality powder metallurgy components.
Understanding Powder Flow and Pressing Limitations

Metal powder acts quite differently from liquids in die cavities. This creates unique challenges that part designers must address. Unlike fluids that spread pressure evenly everywhere, metal powders mainly flow where force is applied with very little sideways movement.
Frictional behavior of metal powders in die cavities
Metal powder particles and die walls create friction that significantly affects how well compaction works. The powder gets compressed while frictional forces work at right angles to the normal force where it touches the pressing tools. Research shows the friction coefficient usually starts at 0.2 and changes throughout compaction. This change follows a clear pattern:
- The original particle shifting allows easier sliding on the die walls when the friction is low
- Particles lock together at medium pressures, which makes the friction peak
- The powder acts more like a solid material at higher pressures, and friction drops to typical metal-metal contact levels of 0.1-0.2
These friction effects create uneven density in green compacts that later cause shape changes after sintering. Higher compaction speeds tend to reduce friction coefficients and lead to more even shrinkage.
What limited lateral flow means for part geometry
Designers face major geometric limits because metal powders don't flow like hydraulic fluids. Complex contours and detailed features become hard to make consistently due to limited sideways flow. Pressure also becomes uneven within the powder mass since compressive forces get weaker farther from the punch surface.
Success in powder compacting requires specific design rules. The part's cross-section needs consistent compression ratios throughout. On top of that, designers need to use minimum wall thickness guidelines (1.52 mm) and avoid length-to-thickness ratios above 8:1 to prevent weak spots.
Powder compacting presses and their role in achieving even density
Getting even density distribution depends heavily on powder compacting presses. Single-action presses push from one direction, which creates density differences as pressure drops away from the punch. Double-acting presses squeeze powder from both ends to achieve more consistent density throughout.
Turret and paddle speeds must match powder flow rates exactly. This prevents issues like dies not filling completely or too much blending. Dies might not fill properly at high turret speeds because the powder doesn't spend enough time under the feed frame. Understanding friction becomes vital for successful simulation since friction effects mainly cause density variations.
Even density remains vital because variations lead to uneven sintering, distorted shapes, and parts that might fail.
Geometric Design Rules for Powder Compacting Dies

Powder metallurgy die design needs strict geometric rules that work with metal powder's unique flow patterns. These rules help maintain component integrity during compacting and prevent tools from failing.
Core rod stability in hole formation
Core rods create internal holes in powder metal components and can make round, D-shaped, splined, or keyway features. These rods must stay perfectly straight during compaction and ejection to avoid size problems. Engineers need to figure out the right diameters and lengths of core rods to stop them from buckling under heavy compaction pressures, especially when pressing forces can hit 10 tons.
Minimum wall thickness: 1.52 mm guideline
Die fill rules set a crucial design standard: wall thickness must stay above 1.52 mm (0.060 inches). Some manufacturers say they can work with 0.06-0.08 inches, but most experts stick to the 1.52 mm rule. This standard exists because:
- Thinner walls make tools that break easily
- Very thin sections don't let material flow well
- Sintering makes size control unpredictable
Flatness control through repressing and boss design
Keeping parts flat is one of the biggest challenges, especially with thin components that can warp during sintering or heat treatment. Two methods work well to control flatness:
- Repressing operations that improve overall flatness
- Using projection bosses instead of full face areas, since bosses stay flat more easily
Boss design needs specific rules for punch tool cavities. These include draft angles of at least 7 degrees (better at 15 degrees) on each side to keep the compacted boss from sticking to the punch.
Avoiding long thin walls: 8:1 length-to-thickness ratio
The length-to-thickness ratio stands out as the most vital geometric rule. Parts develop density variations once this ratio goes beyond 8:1. Uneven die fill and inconsistent pressure across the powder mass cause these variations. Even with special steps to fill evenly, density variations happen beyond this limit and lead to structural weak spots and sintering distortion.
Feature-Specific Die Design Considerations

Powder metal components need careful attention to specific features during die design. This ensures part quality and makes tools last longer. Each design feature brings its own manufacturing challenges that need precise measurements.
Chamfers vs. radii for edge durability
Part edges work better with chamfers than radii to stop burring during powder compaction. The best results come from bushings that have a 30°–45° chamfer with a 0.13–0.38 mm (0.005–0.015 in.) flat. This eliminates feathered edges. Large-angle chamfers can be made using bevels in dies or core rods. But these slow down production because of die-fill problems and powder that gets stuck between tools.
Countersinks and punch edge protection
Tool protection becomes crucial when designing countersinks around holes for screw or bolt heads. A punch-formed countersink needs a 0.25 mm (0.010 in.) nominal flat. This stops sharp, fragile edges from forming on the punch that would quickly wear down during production. These measurements are vital to keep tools from failing early and maintain exact part shapes.
Boss and flange formation limits
Die-machined steps or shelves can produce relatively small flanges effectively. Larger flanges always create problems during ejection. Therefore, bottom flange edges and joints need generous radii. Boss formation requires carefully placed cavities in punch tools. These cavities should not be too deep compared to the part's height. Draft angles must be at least 7 degrees—15 degrees works better—on each side. This keeps the compacted boss from sticking to the punch.
Studs and hub geometry constraints
Hub sections that complement gears, sprockets, or cams need generous radii between their hub and flange parts. Designers must leave enough space between the hub's outer diameter and the root diameter of gear or sprocket features. This spacing helps prevent density variations that could weaken the structure.
Groove depth limits: 15–20% of part length
Groove depth has strict limits based on shape:
- Curved or semicircular grooves can be up to 20% of the part's total length
- Rectangular grooves should not exceed 15% of the part's length, need 12° draft on surfaces parallel to pressing direction, and must have radiused corners
Deep and narrow slots and grooves require fragile tool parts. It's best to avoid these whenever possible.
Tolerances, Prototyping, and Manufacturability

Powder metallurgy manufacturing faces a big challenge with dimensional accuracy. The powder compacting process differs from traditional metalworking because it involves complex relationships between material properties, processing parameters, and finished part tolerances.
Sintering effects on dimensional accuracy
Part dimensions change when sintering transforms pressed powder into a cohesive structure. Companies must minimize green density gradients to reduce differential shrinkage during sintering. This helps prevent shape distortion. Most Sintered Components shrink between 6% and 15%, which depends on material composition and processing conditions. The shrinkage doesn't happen evenly - diameters change differently compared to heights.
Parts become more dimensionally precise at higher sintering temperatures. The increased diffusion creates even microstructures and rounder pores. The quality of compaction, especially density uniformity, plays a crucial role in determining the final part geometry and how reliably it performs.
Tool wear and green density relationships
Hard metal powders wear down dies quickly through repeated use, which affects dimensional tolerances. Tools used in powder compacting face three main types of wear: abrasive wear (most common), adhesive wear, and surface fatigue. Die wall friction plays a key role in both wear rates and part quality. Friction coefficients usually start around 0.2 but change throughout the compaction process.
Lubricants can reduce friction and make tools last longer. Most companies use stearate powders at 0.4 to 1.5 weight % concentration. Surface profilometry offers the quickest way to calculate wear by measuring surface topographies.
Prototype options: PM blanks vs. full pressing
Manufacturers usually pick from these three approaches for prototype development:
- Machining from PM blanks (slugs)—this works best for 1-50 parts that need properties matching production components
- Hybrid PM-machining—compressing with defined features, then machining additional details
- Full pressing with complete tooling—ideal for volumes above 50 parts or simple configurations
Designers can verify their designs affordably before investing in production tooling. Jiehuang, a famous powder metallurgy products company in China with products sold worldwide (especially to Italy, Poland, Denmark, the USA, and the UK), can help assess your designs—simply send your drawings for immediate feedback!
When to use sizing for tight tolerances
Sizing brings parts back to correct dimensional specifications through cold pressing after sintering. This process can improve dimensional precision by up to 50%. Small components can achieve tolerances as tight as ±5 μm. Dimensional accuracy typically improves from IT8-IT9 to IT6-IT7 after sizing.
The process works best with single dimensions but doesn't deal very well with multiple dimensions at once. It's especially effective for parts with regular inner and outer diameters. However, special-shaped or irregular components like gears present more challenges.
Conclusion
You need a detailed understanding of material behavior and precise die design principles to become skilled at powder compacting. This guide shows how metal powders are different from liquids. They flow mainly in the direction of applied force and have minimal lateral movement. This behavior needs specific geometric constraints. The minimum wall thickness guideline of 1.52 mm and the 8:1 length-to-thickness ratio limit are crucial.
Die designers must think over feature-specific requirements for the best results. Chamfers work better than radii for edge durability. Countersinks need careful punch edge protection. Boss formation, flanges, and grooves each need their specialized approaches. These design rules directly affect part quality and tool life.
Dimensional accuracy is maybe the biggest challenge in powder metallurgy. Sintering changes part dimensions with shrinkage from 6% to 15%. Tool wear affects tolerances during production runs. Manufacturers can pick from several prototyping options based on volume needs and complexity. Sizing operations give big advantages to achieve tight tolerances after sintering.
The best powder metallurgy results depend on balancing material choice, geometric design, and processing parameters. Jiehuang, a well-known powder metallurgy products company in China, sells products worldwide - especially to Italy, Poland, Denmark, the USA, and the UK. They can assess your designs quickly when you send your drawings!
Engineers can now tackle powder compacting projects with confidence after reading this expert guide about die design optimization principles. This leads to better quality components, longer tool life, and more efficient manufacturing processes.
FAQs
Q1. What is the minimum recommended wall thickness for powder compacted parts? The minimum recommended wall thickness for powder compacted parts is 1.52 mm (0.060 inches). This guideline ensures adequate material flow, dimensional stability during sintering, and prevents fragile tooling prone to breakage.
Q2. How does sintering affect the dimensions of powder metallurgy components? Sintering typically causes shrinkage ranging from 6% to 15% in powder metallurgy components, depending on material composition and processing conditions. This shrinkage can be anisotropic, with different dimensional changes in diameters versus heights.
Q3. What is the maximum recommended length-to-thickness ratio for powder compacted parts? The maximum recommended length-to-thickness ratio for powder compacted parts is 8:1. Exceeding this ratio can lead to unavoidable density variations, potentially causing structural weaknesses and distortion during sintering.
Q4. How can dimensional accuracy be improved in powder metallurgy components? Dimensional accuracy can be improved through sizing, a cold-repressing operation performed after sintering. This process can enhance precision by up to 50%, achieving tolerances as tight as ±5 μm for small components.
Q5. What are the key factors to consider when designing features like bosses and flanges in powder compacted parts? When designing bosses and flanges, consider generous radii between sections, draft angles of at least 7 degrees (preferably 15 degrees) for boss cavities, and avoid oversized flanges to prevent ejection difficulties. Additionally, maximize spacing between hub outer diameters and root diameters of accompanying features to prevent density variations.